Showing posts with label Platinum. Show all posts

Sunday, August 30, 2020

Platinum reflection

I was not sure where to begin designing for the platinum brief because the theme was men's jewellery and the piece still fell within my concept of organic jewellery. I started off looking at different types of men's jewellery and eventually decided to work with a drawing of an abstract organic pattern that was influenced by a reference picture of a tree.

 I wanted to use enamel to incorporate colour but without using a coin frame setting. Nora Kovats stood out to me because she creates simple settings that I would never have thought of to hold enamel. I tried to set two enamel pieces but I felt that it was too close to Nora Kovats' work and I wanted to make my work different. To make the piece my own, I decided to make a brooch and only set enamel on one side. 

 Enamel can be tricky as some colours do not work well together, so many tests need to be done. Working with enamel with more than one colour is hard as you can only have control over a few variables, like temperature and timing, that will determine the outcome of the piece. Once it is in the kiln, I have no control over how the colours will interact with one another. A benefit of the randomness of the interaction between two colours is that it looks organic and unforced.

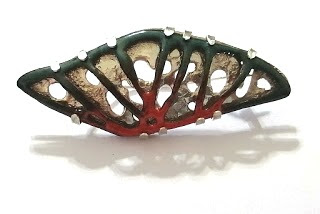
 The brooch's shape had to be changed because the initial circle with a confined pattern mimicked Nora Kovats' work too much. Instead, I worked with the shapes the pattern was naturally creating. I eventually found a shape within the pattern that I liked as the negative spaces seemed to converge towards one point. This ended up looking like a butterfly wing which added to the contrast of the fragile enamel being set in platinum.

 I was considering placing a cast succulent under the enamel to add some texture but it was too overpowering for the design. Instead, to add texture I experimented with a melted pattern/texture. Just like working with enamel, the melted pattern had variables   that I was unable to control. I could drill a hole where I wanted a melted hole, but I had no control over how the metal would melt. That is why making prototypes and having a backup hammered texture was important.

 As I made my first prototype, I noted changes to make to my process for the next prototype. The notes on my claws were actually beneficial when working with platinum as the metal splitting occurred in both silver and platinum. The brooch pin was a struggle for me as I wanted to incorporate the pin into the design, so I referred to some technical references. By the time I had finished the third prototype, I only noted a few small changes before starting with the platinum.

 Working with platinum had its own challenges but from making three prototypes I did not experience as many problems as I would of if I did not make a prototype. The melted texture worked out really well in the platinum. To make my finished piece more presentable for the completion I came up with a plan to use gel nail polish to make the edges of the enamel and designed my own custom box origami box with inner support for delivery.

 I felt my piece and the design fell into the design hook "self belief" from the brief, which they described as, "staying focused and persevering in the face of challenges: overcoming lows". They also used the words "perforation", which fits the design, and "mismatch", which for me connects to the pairing of strong platinum and fragile enamel. I encountered many challenges while making this piece. However, I feel that the moments where I lost control of the process reminded me of times in our lives where no matter how hard we try to control a situation, the outcome is out of our hands. Like I did when creating this piece, we sometimes must take a step back and find the beauty that comes from letting things happen the way they were meant to happen.


Thursday, August 27, 2020

Strengthening the box

 The paper box needed strength so that it does not get squashed during transit. I had a few ideas on how to strengthen the box by making it from cardboard, inlaying the inside with card or metal. 

I decided to work with styrofoam to add protection to the piece and to give the box structure from the inside. I cut a slot for my piece to fit on its side instead of face-up as I found it easier to remove out of the styrofoam. I also cut finger spaces just to add some room to grip the piece when removing it.

The box kept its shape with the styrofoam, but it didn't want to stay closed, so I used a magnet to hold the box closed. I didn't want a magnet that would be too strong that might tear the paper and then my dad gave me a great idea to use a magnetic bookmark as they have the perfect strength to hold the paper. I had an old bookmark that had torn in two, so I used it. I attached one half in the flap of the lid and the other on the styrofoam inside the box and it seemed to hold pretty well, the dark edge on the edge of the box which can just be seen in the image below is actually the magnet.

Bowes, K., (2020). Paper box with styrofoam centre. 
 

Saturday, August 22, 2020

Custom Box

The platinum competition takes place in Johannesburg which means our pieces must be couriered. Therefore, we need to have our pieces in some sort of box so that they will be protected during transit. I wanted to make a box using origami as an origami box would not take long to make and it can be customised.

I tried two different origami boxes a square ring box and a rectangular box that both have lids included in the design. I found tutorial videos for both boxes on YouTube which was very helpful. I decided to customise the rectangular box as my piece does not fit in the square box. I reduced the size of the rectangular box and printed my pattern on the paper so it fits with my piece, but I need to work on strengthening the paper box.


Figure 1 -Bowes, K., (2020). patterned on the box.
Figure 2 - Bowes, K., (2020). box with my prototype.

Monday, August 17, 2020

Neat edges

To neaten up the edges I was going to enamel the edges, but it is a risk as I could easily over fire the top. To enamel the edges, I also cannot enamel where the claws are, as when I put pressure on the claws to set the enamel cracks, and the edge enamel could crack the top.

 Lihle works with gel nail polish, and she suggested using some of her gel on the edges as it looks like enamel, but it does not require heat to set, it sets with a UV lamp. Therefore, I can set the enamel and then paint the gel with a very fine brush that is used for painting designs with gel nail polish on nails.

Figure 1-Bowes, K., (2020). Enamel with copper edge.

Figure 2-Bowes, K., (2020). gel brush and gel on a nail.

Figure 3- Bowes, K., (2020). Set enamel with gel edges.


Monday, August 3, 2020

Platinum texture II

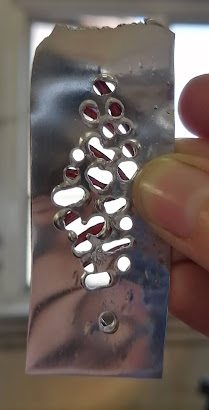
Melting the pattern/texture in platinum was in some ways different and the same as melting silver.  The platinum doesn't texture like silver does but it does bubble, like silver which was surprising. That means I need to forge the claws before trying to set them like I did with the silver otherwise they might break off.

The interesting thing about melting the platinum was in silver I drilled two holes and pierced between them to melt the longer holes, but this did not work in platinum. In the platinum, it just melted one hole and fills the second drilled holes. For me to melt elongated holes I had to push the metal with the hot flame.

I first thought I was overdoing it with the number of holes but once I finished and placed the enamel over it, I am very happy with it. This would set off anyone that has Trypophobia (the fear of clustered holes, bumps, or patterns).

Bowes, K., (2020). Enamel over the texture.
Bowes, K., (2020). Enamel viewed from the back.

Thursday, July 30, 2020

Enamels

I did an enamel piece to go with my platinum but I ended up accidentally chipping it in 3 places and I just really wasn't happy with it at all so I decided to enamel a few more pieces and maybe try other colours.

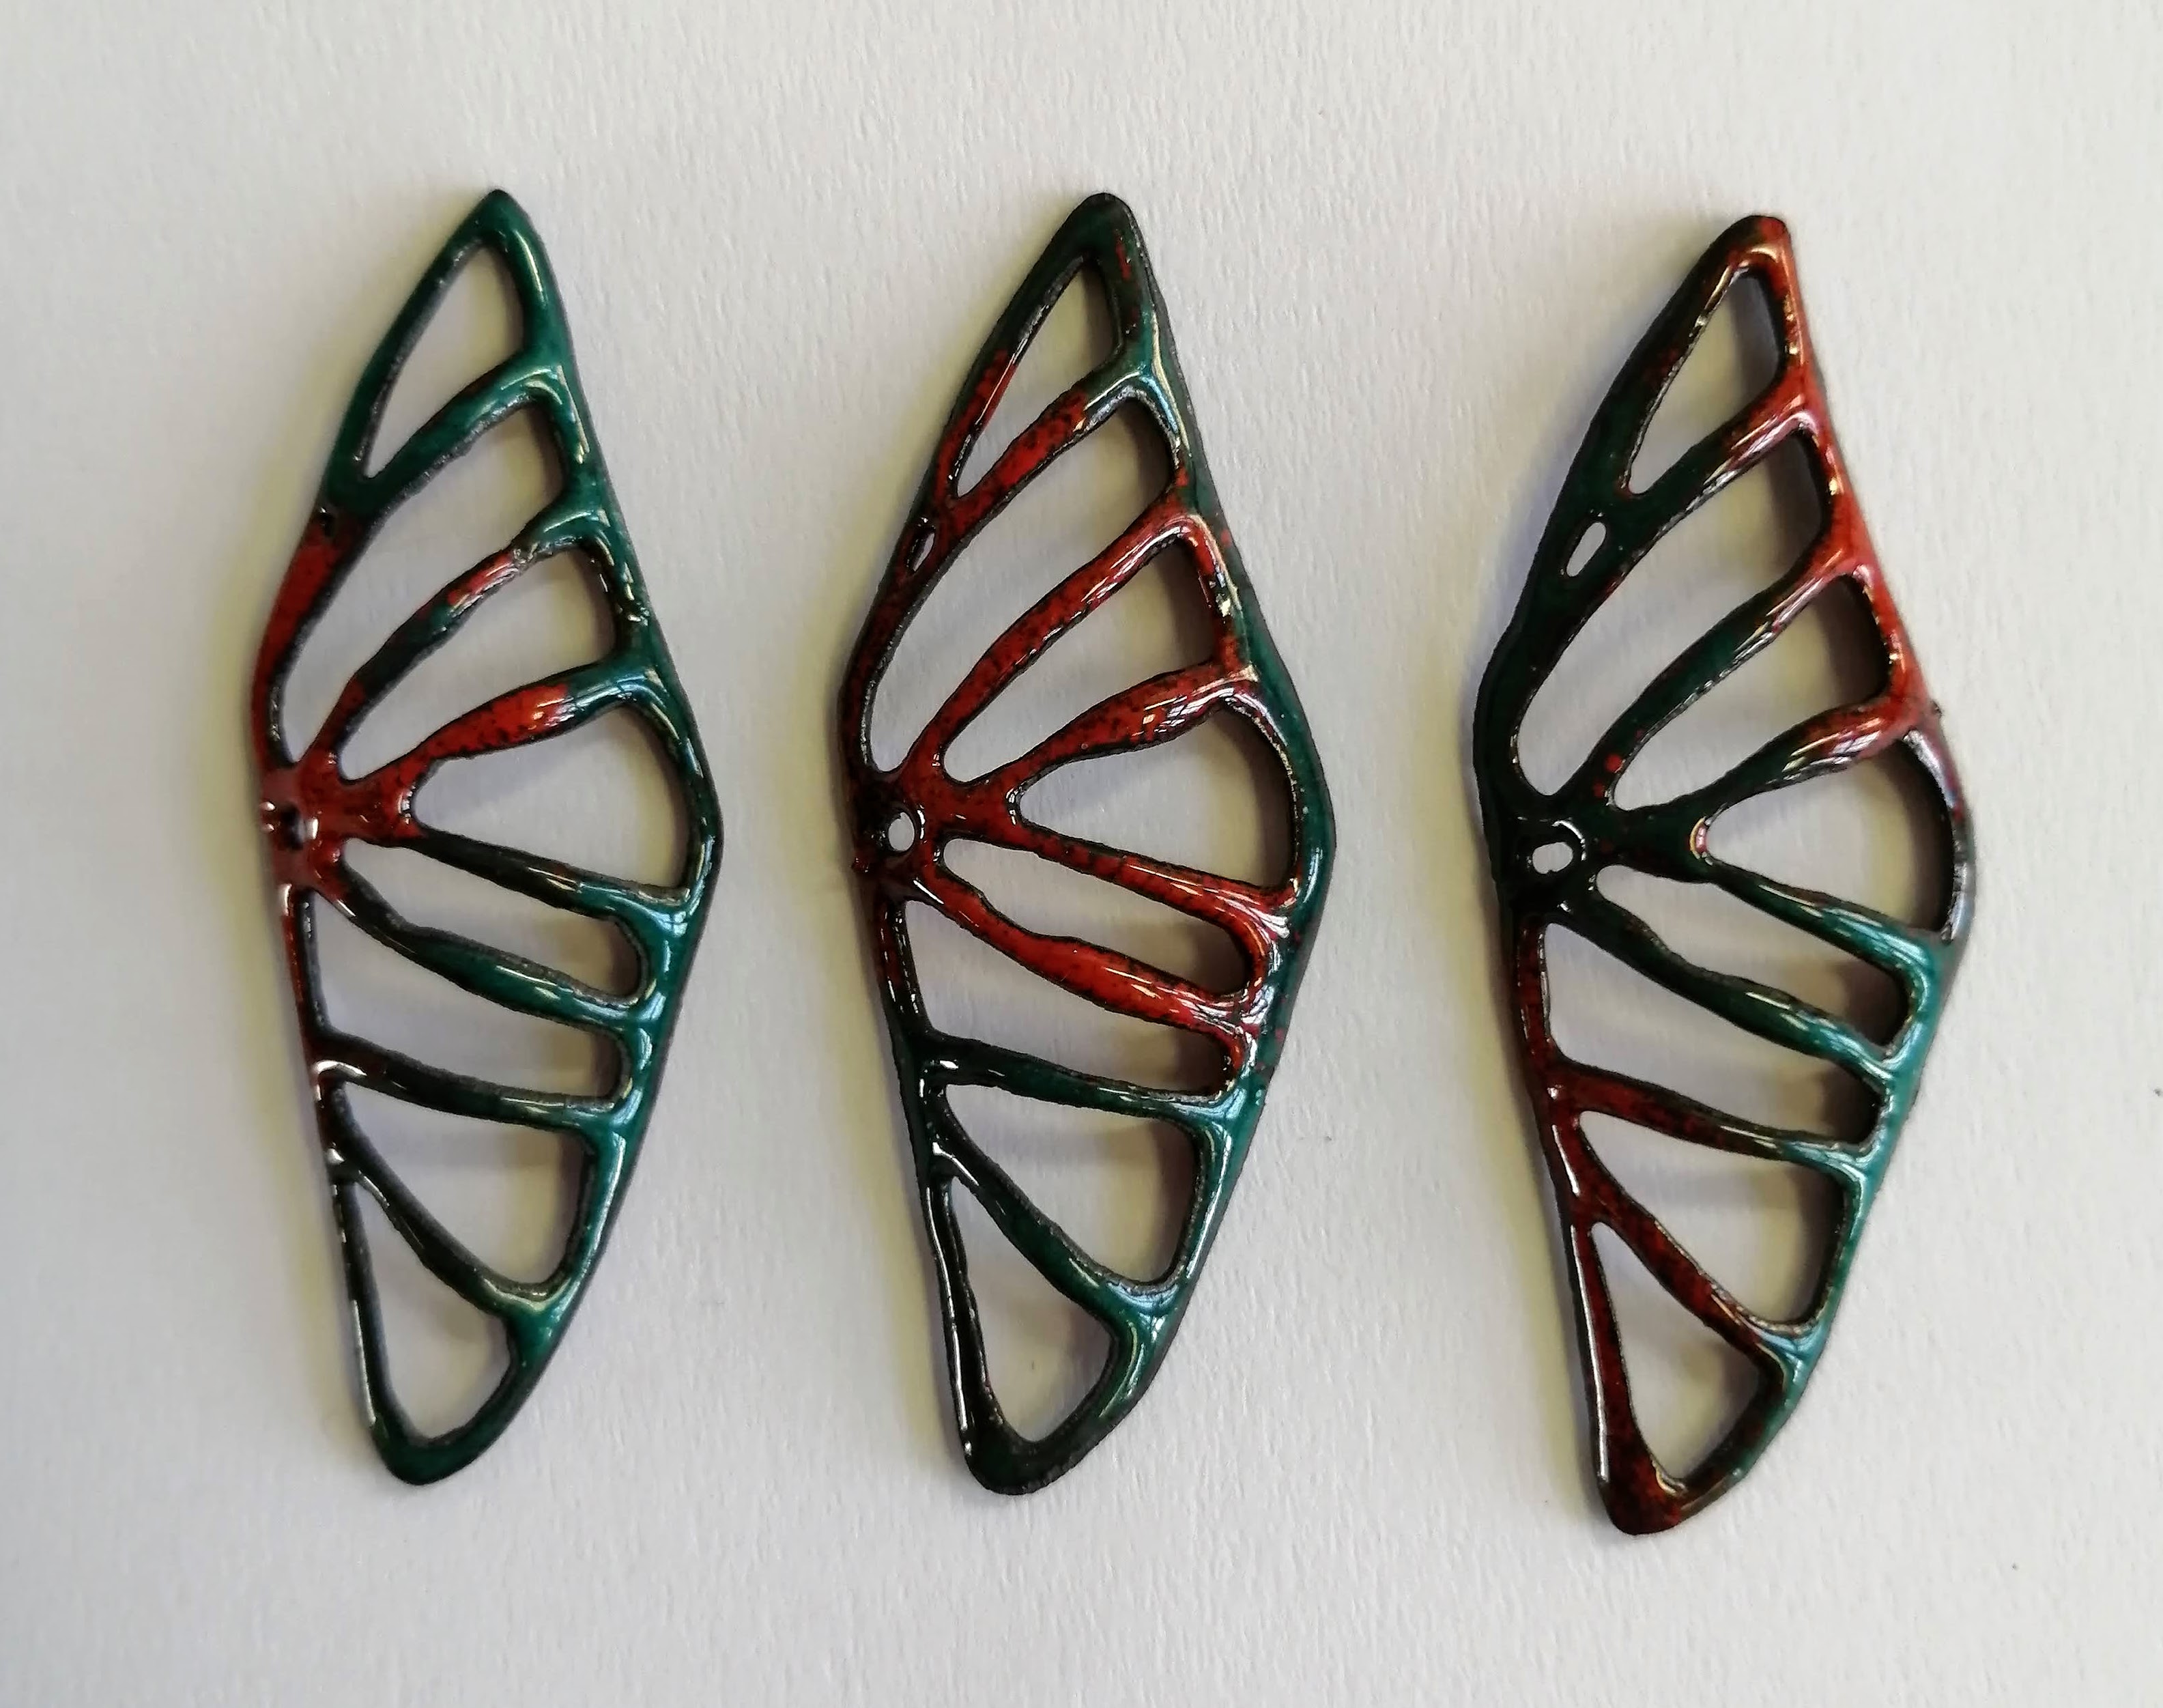
My first 3 were disasters, looking at figure 1 from left to right my first one for some reason became narrow I think this was from trying to get the enamelling tripod to hold the piece but it ended up squashing it. The second one I tried a different green but the red did not fire into the green, as nicely. I also wanted to try the red on a dark colour like blue but as the red cooled and became brighter after enamelling all I could see was Spiderman colours and I cannot unsee it.
Figure 1 -Bowes, K., (2020). First 3 enamels.

I decided to stick with the blue-green I was originally working with as I have fallen in love with how the two enamel colours complement each other. I did 3 variations of the placement of the red enamel. I am going to work with the enamel on the far right of figure 2.

Figure 2 -Bowes, K., (2020). My second set of enamels.
 

Wednesday, July 29, 2020

Platinum Texture

I wasn't sure how the platinum would melt and if it would texture at all so my plan was to use a textured steel block to add texture to my platinum and then melt the holes for my pattern. I used a steel block I was given have had a deep grove on the one side and added more marks to create the texture (Fig.1). I did test the texture on a piece of silver as seen in figure 2.

I had a small extra piece of the platinum plate so I decided to test how the platinum would melt and see if it does texture in any way or not. The platinum melts beautifully (Fig.3) and I do not think I need the steel block texture at all. I just need to remember to reduced my flame and use the annealing goggles because with the melting goggles are too dark and by the time the metal had heated up enough for me to see the hole had melted too large. 

Figure 1 - Bowes, K., (2020). Textured steel block.

Figure 2 - Bowes, K., (2020). Textured silver.


Figure 3 - Bowes, K., (2020). Melted platinum.

Tuesday, July 28, 2020

First challenge

While working with platinum there are changes that will take place. My first challenge took place yesterday, as I was rolling my metal I knew when the plate thickness got to 1mm I had to cut off some metal to make wire but unfortunately, my plate didn't get as long as I had hoped (Fig.1). I cut some off and tried to draw it but it wasn't getting as long as I needed. My two options to correct this is to either melt/fuse my scraps to make wire or I could also use spring steel wire that we usually use for brooches, which I am actually going to use I'm not sure yet.

Figure 1 - Bowes, K., (2020). 1mm thick plate and enamel.

Small changes

There are a few small changes I need to take into consideration when making my piece in platinum. 
The claws are a bit too long so I will need to shorten them. I need to curve the claws before pushing them over to set the enamel as not much pressure can be put onto the enamel. The claws aren't close together like the setting experiment so the edges of each claw can be felt so I will need to file the sharp edges off.

When setting the enamel shifts slightly and this exposes the setting on the side which looks a little untidy as seen in the image below. If the setting is slightly smaller than the enamel, then if it shifts slightly the setting will still not be seen.

For the pin, I used drilled holes instead of using the melted holes I created for the pattern as the pin moves too much but with the drilled holes being the exact same size as the wire means the wire doesn't have wiggle room and is more stable. The pin is also then not very visible from the front. I also need to remember to keep the pin above the centre of the pin otherwise when worn it falls forward.

Bowes, K., (2020). Close up of setting.


Wednesday, July 22, 2020

Third Prototype

I melted my first 2 prototypes and started from scratch. 
The first change I made was that I focused my flame towards the centre when I melted the pattern in the silver to try to prevent bubbling near the claws. I was also advised that the claws broke due to the crystal structure of the metal changing due to the intense heat of melting so I followed the advice of hammering the claws to compress the crystal structure and then annealing the claws so they could bend easily without breaking. I am glad to say that it worked, and the claws stayed intact, as seen in figure 1. 

In the first prototypes, I tried to wrap the wire around the melted pattern, but I struggled, and the brooch wire kept kinking. I changed the way I attached the pin, so the wire didn't kink and looks more discreet from the front. My brooch pin was also flat in the first test which isn't right as I forgot to accommodate for fabric, so I took that into consideration in this prototype (Fig. 2).

Figure 1 - Bowes, K., (2020). the front of the brooch.

Figure 2 -Bowes, K., (2020). the back of the brooch.


Tuesday, July 21, 2020

Process II

I first tried to add a pin onto my first brooch prototype, which sort-of worked. However, the wire was too thick, and the catch was too short, as seen in figure 1.

Figure 1- Bowes, K., (2020). First prototype with the catch.

I then moved on to the second prototype, I cut smaller claws (Fig.2) and used thinner wire for the pin (Fig.3). I still encountered a lot of hiccups though. The texture from the melted pattern made the claws weak and brittle that some of them fell off which can be seen in figure 4. The brooch pin was too flat with the catch still being too short. Additionally, the pin wire kinked so I had to anneal it which caused the spring in the wire from working hardening to be lost. 

I am going to do another prototype to work out some of these flaws.

Figure 2 -Bowes, K., (2020). second prototype.
Figure 3-Bowes, K., (2020). back with the brooch pin.

Figure 4- Bowes, K., (2020). brittle claws.

Monday, July 20, 2020

Brooch catches

Looking at these examples to get some ideas of catches I could use for my brooch. I noticed that there must be something that gives the pin spring which is made from a piece of wire pressing in the opposite direction (Fig.1) or from a spacer. A spacer just needs to raise the pin higher than the catch, figure 2 uses the wide jump ring and figure 3 has the wire bent into a spacer. Figure 4 was interesting as half of the catch curves with the shape of the brooch making part of the brooch design.
Figure 1
https://za.pinterest.com/pin/774971048370869197/
Figure 2
https://za.pinterest.com/pin/774971048370869186/

Figure 3
https://za.pinterest.com/pin/774971048370869427/

Figure 4
https://za.pinterest.com/pin/774971048370869237/

Sunday, July 19, 2020

Claws

I continued the pattern from the copper (Fig.1) to cut claws that will hold the enamelled copper (Fig.2). I am not sure how the claws would look set though so I bent up the claws to see how it would look. I think the claws are a bit too large and need to fit in more with the enamel pattern. I used Art flow to draw on a photo of the enamel piece as to where claws would be placed to fit with the pattern, as seen in figure 3. This means the claws will be small and will not so overpower the enamel.

Figure 1- Bowes, K., (2020).extending the pattern.
Figure 2-Bowes, K., (2020). cut claws.

Figure 3- Bowes, K., (2020). digital drawing of claws.

Wednesday, July 15, 2020

Process

I made my fly press die and forgot that if the shape is not symmetrical that the shape will be mirrored (Fig. 1). This meant that I had to mirror my pattern drawing so that I could stick the image on the metal and use it as a guide for piercing. 

Figure 1-Bowes, K., (2020). die, cut out from the die and fly pressed copper.

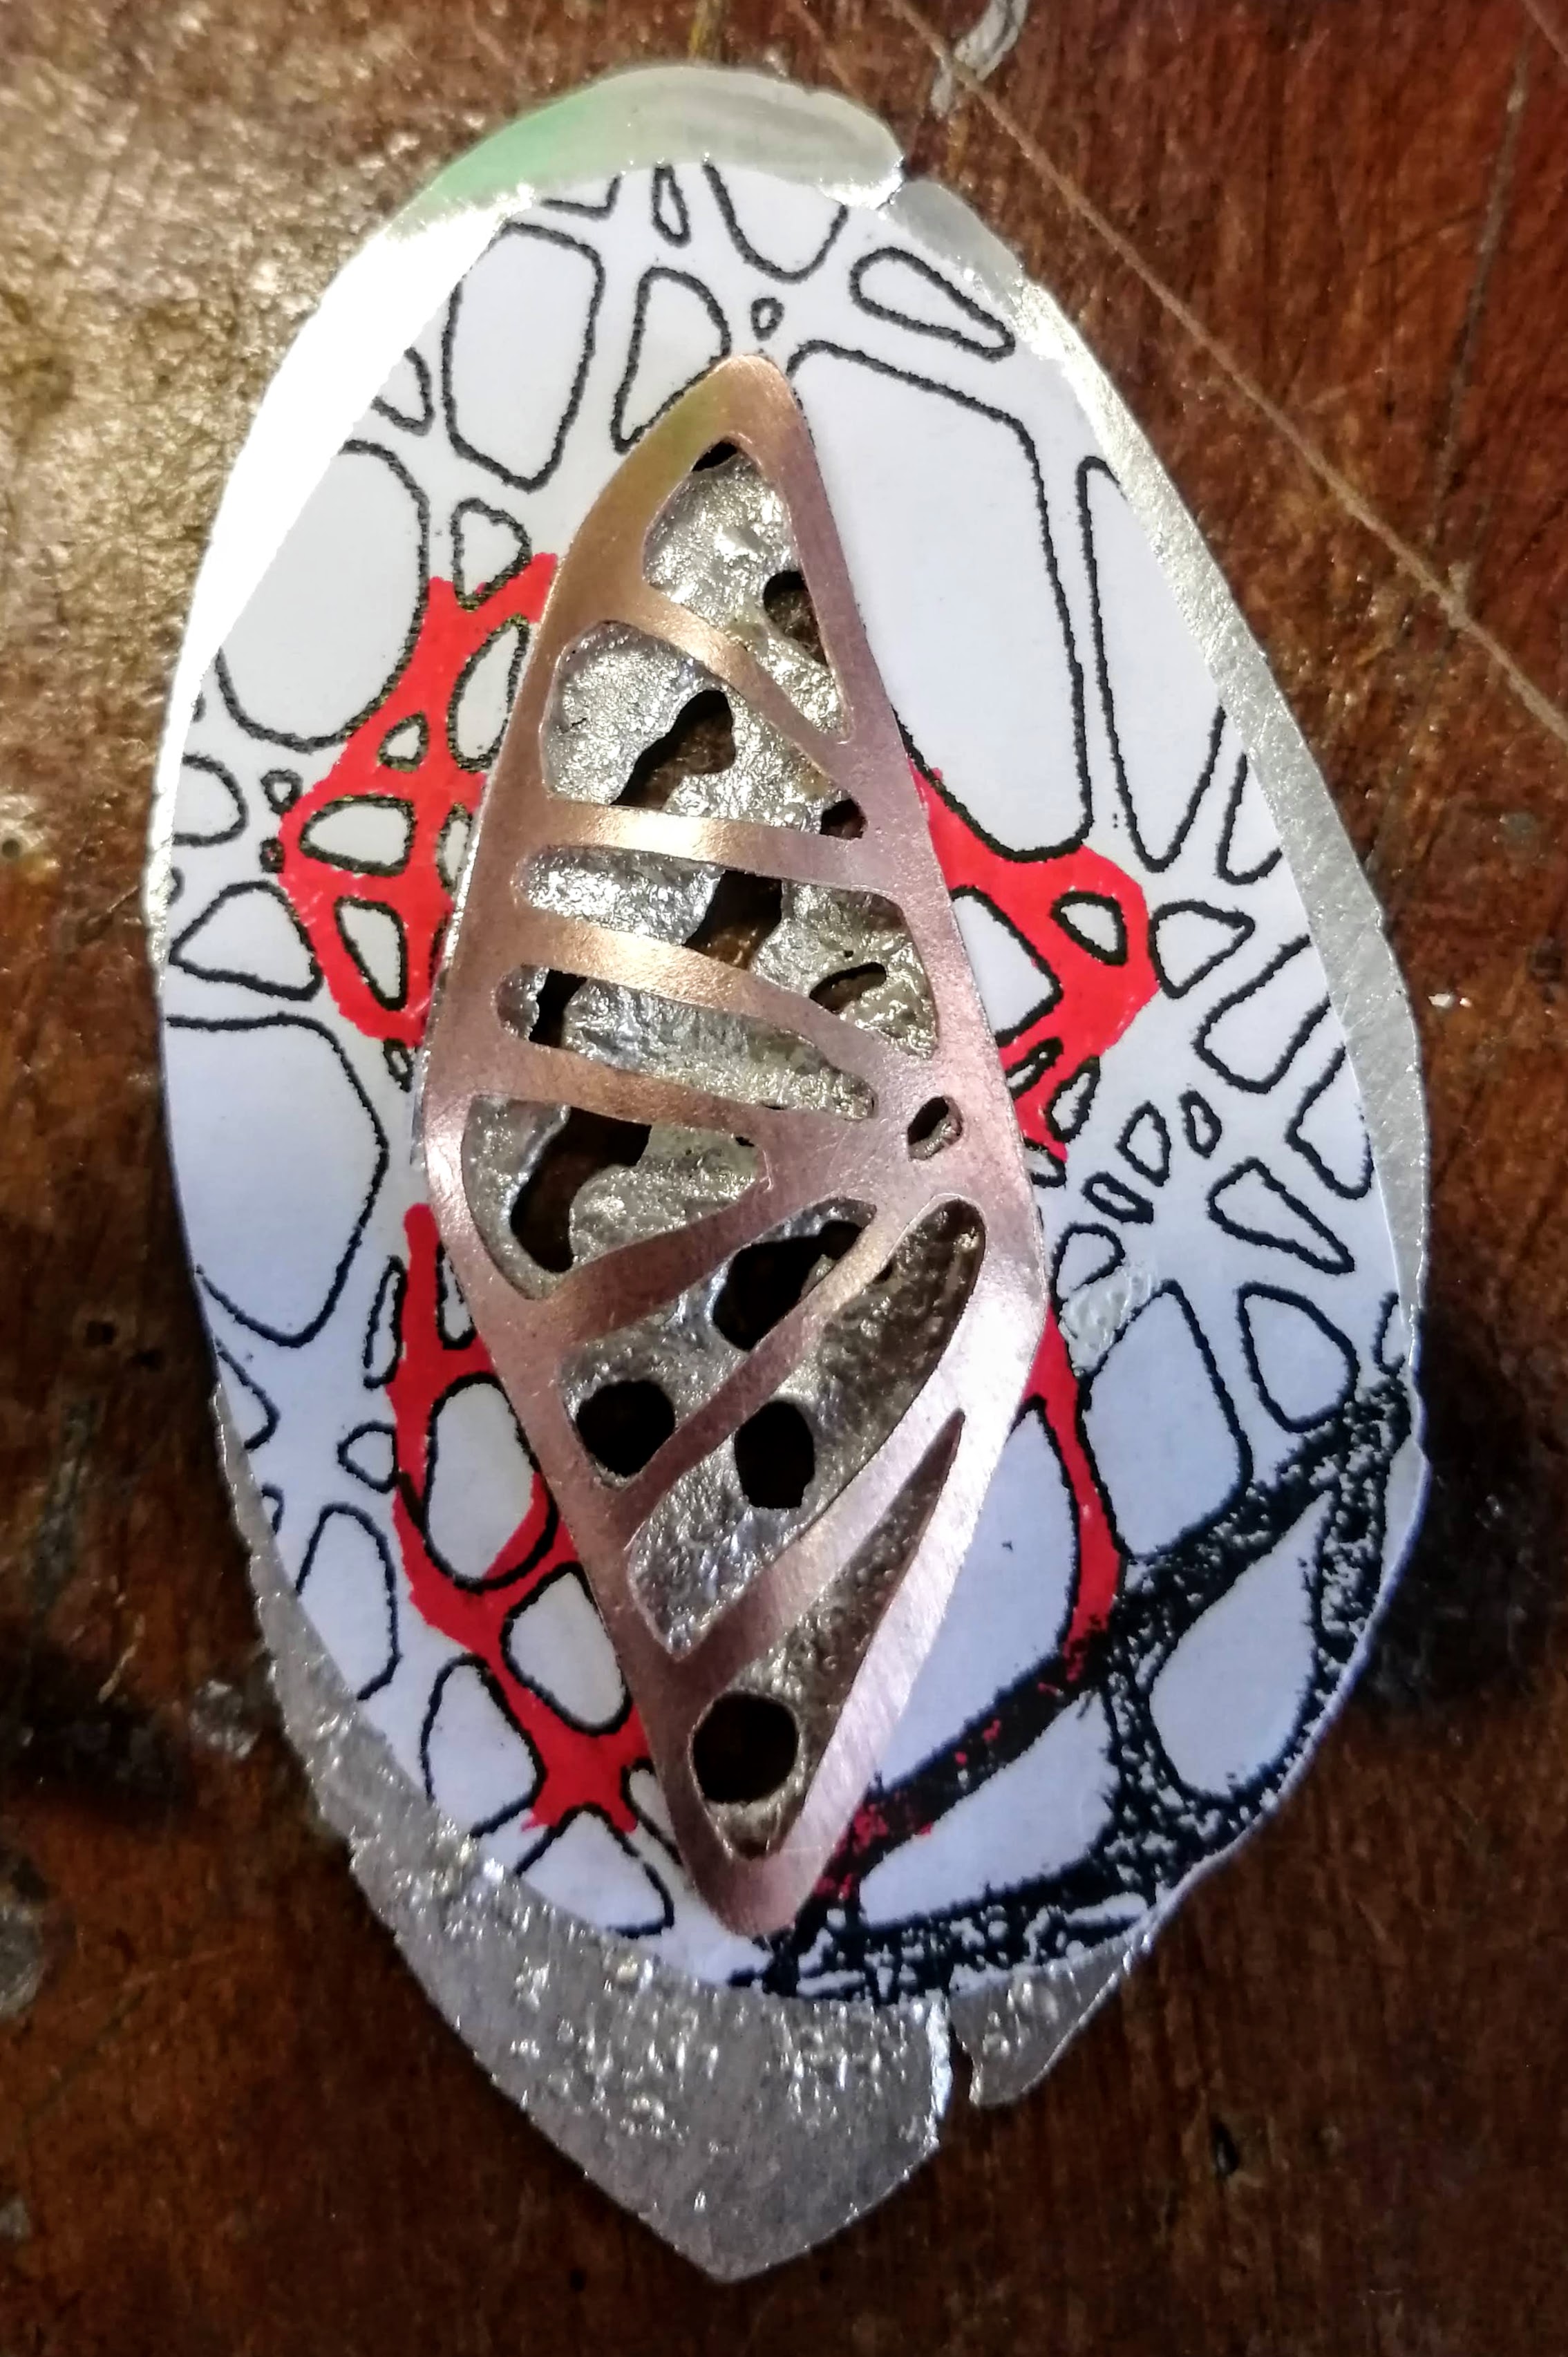
I then started with the melted texture on the silver. I traced around the copper fly press shape so that I left space for the claws to be cut out. I drilled holes and melted the holes; my flame was a bit too harsh, so they melted quickly, and it only textured a bit. I thought that it might be the plate thickness so I tried again with a plate the same thickness as the texture test. I used a smaller, more controlled flame, so the holes were smaller but I still did not get as much texture. I think this is because the test was done on a domed plate and not a flat plate. 

Figure 2-Bowes, K., (2020). first and second textured plate.
Figure 3-Bowes, K., (2020). Dome over the textured plate.

Changes: try to add more small holes to the second plate and make the veins on one of the copper domes thinner to see how it looks if more silver is revealed underneath. Also, I must not forget to leave space for the tube and catch to be soldered on the back for the brooch.


Melted texture

I face the challenge of trying not to pierce the pattern in platinum as this can lead to losing metal easily. It was suggested that I try to drill and melt the pattern holes into the metal. The risk with this is the way copper, silver and platinum melt are all different so it will be difficult to predict the outcome in platinum.

I attempted this technique in copper but the copper pulls to one side creating blobs. I would have been ok with the idea if the copper pulled evenly around the edges.
Bowes, K., (2020). Copper 

I then experimented in silver as copper, silver and platinum will all react differently. The silver melted without leaving blobs and the surrounding metal creates a reticulated texture. 
Bowes, K., (2020). Silver melted texture

I am definitely considering using this as it will create texture on the platinum, I just hope platinum has the same or similar reaction as the silver, which will make the pattern less flat meaning there is no need for the cast succulent. I think this will also link closer to my tree reference that inspired the abstract pattern as the outer tree does not have a very textured bark and the inner tree has a very rough textured bark.


casting or no casting?

After I chose my shape, I could not get past the idea of the pattern on the setting being flat and boring. I was thinking of incorporating one of my cast succulents into the setting to add some form under the enamel dome. I tested what it would look like with some test pieces and I think it might work (Fig.1).

The only thing is with using this idea for platinum is that I cannot enamel on or cast in platinum which means casting the succulent in silver but then only the setting would be in platinum. My sketches are not accurate as I realized I will not have enough platinum to make the setting very big so that the succulent is only in the one corner as seen in figure 2.  The succulent will take away from how much platinum is visible between the enamel if I make the setting smaller. 
Figure 1-Bowes, K., (2020).  test pieces.


Figure 2- Bowes, K., (2020). Quick sketches.

Shapes

Yesterday I was very overwhelmed by all the ideas and options I had so I had to choose what to work with and what to put on hold for possible future pieces. I have posted a lot of this on moodle so my thought process will start in this post and continue in a few posts to come.

I decided to work with the set enamel idea as a Brooch which means enamel only being set on one side, figure 1 without the bottom claws, so the brooch pin can be placed on the back of the setting.  This is because if I used my glue experiment, I would have to cast and I can't cast in platinum. 
Figure 1- Bowes, K., (2020). enamel setting prototype, set on one side.

I do not want to use a round shape for the brooch as using a set shape forces me to crop the pattern into the shape. I thought about using a shape from the pattern (Fig. 2) but this also means confining the pattern into a shape so instead, I found shapes that are created within the pattern (Fig. 3).

Figure 2-Bowes, K., (2020). shapes from the pattern.
Figure 3- Bowes, K., (2020). shapes formed in the pattern.

I chose an organic compressed rhombus shape that the pattern if viewed from different directions resembles an insect wing (Fig.5) or a section of longitudinal leave venation (Fig.4). 

Figure 4- Bowes, K., (2020). Horizontal.
Figure 5- Bowes, K., (2020). Vertical.

Wednesday, July 1, 2020

Subconscious influences

During the lockdown, I did my doodles and the one pattern I have been using in my work has been bothering me as subconsciously as I had seen something similar somewhere. I finally figured it out there are two places I have seen this type of pattern before. 

The one is this beautiful tree that I have walked past thousands of times in my area (Fig. 1). It is actually two trees (I am not sure what trees they are) the original tree has very rough bark and the symbiotic tree is smoother in texture. The smoother tree has grown around one side of the main trunk of the original tree.

The second place I have seen an abstract pattern like my doodle is back in biology. The centre of most bones especially long bones has a spongy tissue, and this is where marrow is found. All bones are porous but the spongy tissue has larger gaps and if a person has osteoporosis the gaps are even larger. 

Figure 2-Unknown. (n.d.). Biological diagram of bone

Figure1 -Bowes, K., (2020). Intertwining trees.

Tuesday, June 30, 2020

Setting the enamels

I set one half and was actually reluctant to set the other side as I really liked the look of the dome from the bottom (Fig. 2) but I still wanted to see if I could set two enamels so I took some photos and continued to set the other side.
Figure 1- Bowes, K., (2020). After setting.

Figure 2- Bowes, K., (2020). The bottom

I managed to set the second dome using my left hand as my 'peg' to push against while setting with my right hand. It was very uncomfortable at first, but I eventually got the hang of it. I had sanded the claws on the inside, making the metal thinner for setting which made it slightly easier to set. The claws on the edge of the enamels look like a spine, which I find to be very interesting. This distinct shape is probably because my claws are closer together than Nora Kovat's claws are in her setting.
Figure 3-Bowes, K., (2020). Top view. 

Figure 4- Bowes, K., (2020). Side view, claws.

I think this has a lot of promise to lead to other designs. I do not think the double-sided enamel setting would work for a brooch, but it could easily work for a pendant or earrings. If I only put the enamel on one side, I can use this setting for a brooch as well as pendants, earrings etc. I plan on exploring this further and using this technique to make jewellery.

Setting for enamels

I wanted to set my two enamel pieces but didn't know how to go about it until I saw this photo by  Kovats, she uses a piece of metal between her two enamel pieces that has claws in either direction to secure both sides to one middle piece, as seen in figure 1. I thought I would try to set my enamels in the same way but I knew it was going to be difficult as putting too much pressure on enamel can crack it so once the one side is set setting the other side would be a challenge.
Figure 1-  Kovats, N., (2020) Enamel pendant.


I used the same pattern the was used on the domes on the setting plate, but I reduced it and used different sections. I reduced the pattern as the gaps on the domes were large so it would add some contrast also because I did not want the plate to become too flimsy and bends as I set. For the claws, I cut slits bent half up and half down then shaped and sanded them as seen in figure 3. 
Figure 2- Bowes, K., (2020). Pierced pattern on the setting
.
Figure 3- Bowes, K., (2020). Claws. separated