I took apart my silver prototype to test bending an extra SP 115 epoxy skeleton leaf.
 |
| Bowes, K., (2021). Redone prototype. |
I took apart my silver prototype to test bending an extra SP 115 epoxy skeleton leaf.
|
| Bowes, K., (2021). Redone prototype. |
The progress of making my platinum earrings. the image includes the tapered main vein, the placement of the side wires and the assembling just before adding the epoxy.
 |
| Bowes, K., (2021). Platinum assembling. |
I tested three different types of epoxy before I decided on one for my platinum piece because I wanted to find the clearest epoxy that will allow for the skeleton leaf to be viewed in focus while still being flexible.
The three epoxies I tested are, as seen in the photos below: EPLOAM 2022, AMPREG 30 and SP 115. SP115 cured the clearest and was still flexible once heated to be shaped for my earrings. The SP 115 in image 1 was expired but in image 2 it is fresh and a proper example of the cured epoxy.
 |
| Bowes, K., (2021). Image 1- Three different epoxies. |
 |
| Bowes, K., (2021). Image 2- Three different epoxies. |
I completed my second prototype and it is exactly what I had in mind.
 |
| Bowes, K., (2021). Second Prototype. |
I added side wires as a setting almost to stabilize the leaf on the wire(see image below). The only small detail that I want to change is the clarity of the epoxy. The epoxy was slightly yellow and the green from the veins bled into the epoxy making it look murky.
 |
| Bowes, K., (2021). Three-quarter view. |
 |
| Bowes, K.,(2021). Testing 'setting' methods. |
 |
| Bowes, K.,(2021). Stabilization. |
The leaf had a tendency to sill shift on the wire so I added wires, like the side veins, to stabilize the epoxy leaf to the silver wire.
 |
| Bowes, K.,(2021). Prototype 2. |
 |
| Bowes, K., (2021). Front view. |
 |
| Bowes, K., (2021). Prototype. |
I wasn't sure how I was going to attach the epoxy leaf to the silver wire. The flexibility of the epoxy really helped with assembling my prototype.
 |
| Bowes, K.,(2021). Silver wire and Epoxy leaf. |
 |
| Bowes, K.,(2021). Attaching one side. |
 | |
|
 |
| Bowes, K., (2021). Tapered wire. |
 |
| Bowes,K.,(2021). Epoxy flexability. |
 |
| Bowes, K.,(2021). Detailed leaf. |
 |
| Bowes, K.,(2021). Silver and mesh 'leaf'. |
The doubled-up mesh made the tiny 'veins' look more realistic and less ridged but the edges are very messy. Weaving the silver 'veins' wasn't easy and the main stem snapped so more prototyping is needed.
 |
| Bowes, K., (2021). Imitation leaf skeleton |
In an attempt to create my own skeleton leaf, I made the veins out of silver and want to layer them with the mesh. I may even look at doing a double layer of mesh so the lines don't look so ridged.
 |
| Bowes, K.,(2021). Silver and mesh prototype |
I attempted to plait fine silver wire to make my own kind of silver mesh. I used to braid bracelets in my childhood but I really didn't enjoy braiding the silver as I struggled to stop the wire from kinking and differentiating between the wires.
 |
| Bowes, K., (2021). Plat silver |
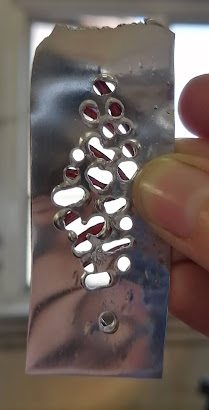
Thinking about working with fibers/paper I folded a piece of paper into a strip creating layers, which is one of the competition design hooks. The lines on the paper reminded me of the aluminum mesh I had at home. The mesh is made from very fine wire and comes in sheets almost like metal 'paper'.
 |
| Bowes, K., (2021). Paper ring |
 |
| Bowes, K., (2021). Aluminum mesh. |
The paper box needed strength so that it does not get squashed during transit. I had a few ideas on how to strengthen the box by making it from cardboard, inlaying the inside with card or metal.
I decided to work with styrofoam to add protection to the piece and to give the box structure from the inside. I cut a slot for my piece to fit on its side instead of face-up as I found it easier to remove out of the styrofoam. I also cut finger spaces just to add some room to grip the piece when removing it.
The box kept its shape with the styrofoam, but it didn't want to stay closed, so I used a magnet to hold the box closed. I didn't want a magnet that would be too strong that might tear the paper and then my dad gave me a great idea to use a magnetic bookmark as they have the perfect strength to hold the paper. I had an old bookmark that had torn in two, so I used it. I attached one half in the flap of the lid and the other on the styrofoam inside the box and it seemed to hold pretty well, the dark edge on the edge of the box which can just be seen in the image below is actually the magnet.
 |
| Bowes, K., (2020). Paper box with styrofoam centre. |
I tried two different origami boxes a square ring box and a rectangular box that both have lids included in the design. I found tutorial videos for both boxes on YouTube which was very helpful. I decided to customise the rectangular box as my piece does not fit in the square box. I reduced the size of the rectangular box and printed my pattern on the paper so it fits with my piece, but I need to work on strengthening the paper box.
 |
| Figure 1 -Bowes, K., (2020). patterned on the box. |
 |
| Figure 2 - Bowes, K., (2020). box with my prototype. |
 |
| Bowes, K., (2020). Enamel over the texture. |
 |
| Bowes, K., (2020). Enamel viewed from the back. |
 |
| Figure 1 - Bowes, K., (2020). Textured steel block. |
 |
| Figure 2 - Bowes, K., (2020). Textured silver. |
 |
| Figure 3 - Bowes, K., (2020). Melted platinum. |
